Proposals for Final Project

I enjoy listening to and playing synthesizers. These days most synthesizers are digital. That’s great because it allows them to be cheaper and reach a greater amount of people while offering a greater flexibility with sound. However there’s a limit to the resolution of digital synthesizers. We also lose a lot from circuits that simulate or model an analog synth. Analog synths are expensive, they’re messy, heavy etc.

1- One idea for a final is to bring analog qualities back into sampled and function generated wave forms. Usually water and synthesizers don’t mix. But if I can run a MIDI controller through a circuit that uses a water height sensor, I think I would be able to add back analog elements into the sounds being played. Also maybe the water can be the expression interface for the instrument itself. I can use other physical qualities of water to manipulate sound and modulation.

proposal-for-final

2- A second idea I had was to detect position along a RGB plane and have that affect color output among other things. There are already MIDI controllers that allow sound modulation along track pad axis. However this could be an interesting project if there is a unique application for it.


Midterm

For our PComp midterm everyone in my class was assigned into groups to work on a project. I initially thought it would be a good idea to use a sensor array to map out a color space and have the output reflect where the user was activating. We ran into some issues with the microphone behavior so we decided to re-purpose our configuration for another interaction.

We ended up making the interaction be based on sound and distance. We mapped 3 sensors to a corresponding color value. We had each color go to 3 LEDs in series. Our idea was that we could get the colors to blend if we diffuse them at a distance.

One of the biggest problems we ran into was dealing with the noise of the environment and the circuit. We couldn’t get the sensor readings to zero or even close to it. So we ended up having to deal with low resolution values for our sensor range.

This is the proof of concept. Using one microphone to control the brightness of the LED.
image5

We then expanded the concept to 3 microphone sensors.
image3

image4

We at the same time wanted to work on the serial communication with P5. We ran into some additional issues here. Most of which probably involved us not using a handshake for communication.

image2

[youtube https://www.youtube.com/watch?v=6a4Kj3TGMXg]

[youtube https://www.youtube.com/watch?v=zl_HptopmWU]

[youtube https://www.youtube.com/watch?v=z2RA5YnfFWI]

Serial Communication Labs 10/22/16

I first worked on the Async serial communication lab. This went fairly well. I didn’t use the accelerometer because I haven’t soldered the contacts yet. Instead I used 2 variable resistors as seen in the pic.

20161021_202857

20161021_204214

I then tried my first attempt at P5 and it was a mess. I tried following along with the directions, but the index.html file didn’t have the line that was referenced. “script language=”javascript” type=”text/javascript” src=”libraries/p5.js”></script”.

I ended up pasting both lines in it. The add file function doesn’t seem to work for me so after a blank file was added, I pasted the contents of the p5.serialport.js inside it.

At some point I was able to find out my serial port name but I can’t seem to open it properly at this point. I am showing the error below. I’ll need to ask for help getting this running.

20161022_212600

Application of Labs

For my basic application I planned on making an alarm box. When someone opens the box when it’s armed, it will flash lights and make a noise. This would occur until a green button is pressed. A red button will be used for arming the alarm.

I think I would have pulled it off if I designed my circuit beforehand. However I was able to have an alarm triggered and and make lights and speaker cycle on and off. I made a lot of errors with running the wires in the wrong direction or forgetting to power the breadboard.

1013160125script

[youtube https://www.youtube.com/watch?v=A7vPsCWMm7k]

Labs: Eletronics v2

For the past week I worked on catching up with the lab assignments. This is the button switcher with LEDs in parallel.

[youtube https://www.youtube.com/watch?v=WDc7WxqJNTc]

The next lab involved a potentiate and LED to simulate variable voltage.

1007162335

[youtube https://www.youtube.com/watch?v=CoHka83xYX4]

Then I built the Servo variable resistor circuit. That was fun and noisy.

1008161535a

[youtube https://www.youtube.com/watch?v=0OR5Na1cnDM]

Now the speaker with photoresistor.

[youtube https://www.youtube.com/watch?v=C4xVgquP038]

The only issue I had was breaking off the lead wire in a Arduino pin socket. Luckily that led to ground. I also got to use a soldering iron to connect the wire leads to my speaker.

Now hopefully I can work on an application of these for tomorrow’s class…

The Circuit against time.

My project for this week was supposed to be a RGB LED controlled by three sensors (FSR, potentiometer and a ping) for each color. I spent such a large amount of time troubleshooting the inputs that I didn’t get to touch the led portion. I should have started this much earlier but I misjudged the time I needed to complete assignment #3.

It could have been exhaustion but I was trying to hook up a digital ping sensor as a variable resistor. I didn’t have my force sensor properly grounded. My pot wasn’t giving a linear progression of numbers until I did something that I now can’t remember (but still a narrow range).

0929160256

I think what’s left for me to do is remap the values to emulate brightness with a blink function…. maybe I should buy a 2nd RGB LED.


Assignment #3: Stalking Interactive Technology

The interactive device I decided to monitor is a parking meter. The physical function of a parking meter is to take your money and return you a talisman. This talisman protects you from receiving cursed objects on your windshield. The cursed objects actually cost more money to get rid of. It behooves you to pay to get a talisman.

A NYC parking meter has one purpose as far as civilians are concerned. That is to allow people to park their motorized vehicles in designated parking areas during the times listed on street signs. I would assume a person selects the amount of time they would like to park and then enter a form of payment to get a receipt to place on your dashboard.

However upon closer inspection, it doesn’t work that way. First I am not sure how many blind people use this machine, but that edge case is not covered here. There is an audio jack that I assume outputs some sort of audio instructions. The language button, which is a different shade of grey than the audio jack, would probably cycle through other common languages in NYC for the audio.

A user walks up to the device and will have to enter there credit card or start inserting $1 or 25 cent coins. I’ve noticed people with credit cards, if they don’t leave the card in the machine for a few seconds it won’t work. This could be a result of the new chips that recent cards feature. However there is no indication to leave the card in the slot until prompted. Some people waited longer than others for it to verify their cards.

After that it seemed pretty intuitive. You increment the time you want (up tot he max) and pay the related price. NYC included a max/time button, which will select the highest time allowed. This actually save you 3-7 clicks depending on the increment scale. After the time is selected you will print the receipt or choose to cancel everything. A downside to this is that you have to pay per half hour, so if you 15 minutes before the free parking period you still pay for the entire half hour.

While it’s nice to accept coins, it’s cumbersome and not useful unless the user planned ahead. I saw someone have to go back to their car to harvest some coins from the car. I would say the user interface is designed well. They used contrasting colors on buttons so you’re less likely to make a mistake pressing one over the other. They also made the Print button big and green.parkingmeter2
Image credit: Pureandapplied.com

The quickest task to do is entering coins and pressing the Print button. The longest possible task ignoring the audio function would be to use a credit card and increment to the max. Then press the Print button. There’s usually no line and only one person waiting if there is. Ignoring the guy running to his car for coins, I would say it’s possible to complete the transaction in under 15 seconds. The credit card method is around 20-30 seconds.

Assignment #2 9/22/16

In our second week of Physcomp we (the class) learned more about analog circuits and how they are analyzed. It was a good refresher for me since it has been a while since I’ve worked or calculated circuits in physics class. That being said, it was a mad dash for me to acquire the components needed for class.

Since I already owned an Arduino I decided to not purchase any kits and hunt for various components independently. That was a lot of work but I think it was worth it in the end because I am a little more intimate with the parts. I had to have a basic understanding of why I am selecting one model over another and did quite a bit a research to make sure I am buying the right thing.

I looked over the labs we covered in class and decided to do a variation of an LED switch circuit. Since we recently read about design and intuitive controls I decided to create a circuit with a RGB LED and 3 corresponding button switches. After some troubleshooting and physics of electronics review I was able to get the circuit working.

Here are some images of the circuit’s progression:

09201623100920162338_hdr0920162355_hdr0920162356_hdr0920162356a_hdr0921160044a_hdr

Some gotchas for me were: The polarity of the dc jack, I had to switch the wires to the Regulator. I also had to figure out the button design by trial and error.

And here we have the RGB LED momentary controller!
0921160044c_hdr0921160045_hdr0921160045a_hdr0921160045b_hdr0921160045c_hdr0921160045d_hdr0921160044b_hdr


Reading Assignment #1

After this class’ discussion and exercise, and reading Chris Crawford’s definition and Bret Victor’s rant, how would you define physical interaction?

After reading the authors’ thoughts, I developed a greater appreciation for the nuances involved in designing interactivity. I agree it’s a buzzword that is overused. I also agree that there is a spectrum of interactivity and it is important to have meaningful communication with all ‘actors’ involved.

I feel Crawford’s definition of interaction was mostly accurate. Can you call a rug with a map on it interactive when a plain color rug is not. I can see why it’s easy to mislead people when the term is so loosely used. A guitar tuner is responsive while an automated guitar peg tuner is interactive. But is the peg tuner really interactive? Are you playing with the expectation of being corrected throughout the show? Does this function affect your playing and vice-versa? Is a 3D movie more interactive than a 2D one if at all?

The other side of the coin is that is do we want interaction everywhere? Does everyone need to have a romantic relationship with their toilet. Who wants to hear a greeting when you poop. Do I want the LEDs in the toilet bowl to change when it’s reading my dehydration level? I think as an artist or engineer this should always be in the back of their minds.

I enjoyed reading the rant even though it was a bit exhaustive. The cliche Minority Report navigation system, or Star Trek consoles are really not the future of UI. People are too lazy to raise their hands above their heads let a lone stand up while reading emails. Flat surfaces are unnatural and don’t really exist in nature. I hate when I was forced into ditching my sliding keyboard on my phone for a on-screen version. The technology has improved by leaps and bonds since then, but I still know a flat surface is horrible for typing on. Also, consider how those who have accessibility issues are being further pushed to the sidelines.

How is something flat designed for humans to use? Victor was justified in his frustration and lack of ingenuity in future of interactivity visualizations. We should not try to unify everything into a flat screen like device. Traditional artists use pens, brushes so a successful UI for them comprises of a tactile digital version of a pen/brush. I feel this idea is very important to keep in mind as one designs products for interaction.

What makes for good physical interaction?
A good physical interaction should be forgettable, mundane and a derivative of your everyday life. If you asked me what was the process of entering a subway in Japan. I would remember being outside and then being inside. I don’t want to have thoughts about the work done in the middle of it.

Are there works from others that you would say are good examples of digital technology that are not interactive?
I would say e-books and other e-publications tend to fall on the non-interactive side. Specifically novels tend to be very straightforward as opposed to magazine publications who are more engaging with web links and embedded video etc.

Jarone Wright Introduction

Hello, my name is Jarone. I was born in NYC. I have a background in Computer Science and
Computer Animation.

For my first class assignment in my physical computing class, we were asked to construct a fantasy device using items found around the ITP floor.

My group decided to work on a universal communicator UI and language processor.

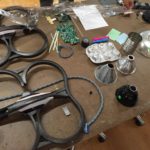
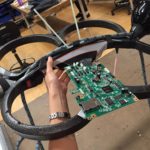
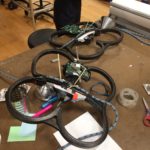
These are the raw material used and the finished prototype:

It was a fun project and I enjoyed working in a group of people I’ve never met before.